Feeds:
Posts
Comments

Time Warp

I can hardly believe 2011 is nearly gone, with 2012 ready to bust its way right into our lives.  Good thing I’ve been posting regularly so infrequently!  Ahh!  What is it about this time of year that makes it all seem like a time warp?  Each year, I endeavor to keep up, and each year, something falls through the cracks.  I guess this blog was bound to wind up in the time warp pile.  But!  This is also the time of year I enjoy a chance to sit back and reflect upon the previous year with an eye toward the future.  Instead of berating myself for not completing every single project under the sun, I’d like to take this time to highlight some of the things I have done, including some surprises.  So, in no particular order….

1.  The infamous wall quilt continues to grow.  We decided to make a big switch by moving our TV/lounge area to what is supposed to be our dining area.  Chief among our reasons for doing so included the fact that a) we never use our dining table for eating (and the photos on this blog prove it; notice how many times our vintage formica-topped table shows up under a craft project??); b) the front room (aka, former lounge room) gets downright frigid in the winter; and c) who doesn’t like to move furniture around in their spare time?  (Stop laughing, mom).  When we made the room swap, the semi-quilted wall remained a constant reminder that it wanted attention.  So naturally, I took the hint…and stuck my Christmas tree in front of it to hide the open wall space!  Ha ha ha!

  Plan for 2012:  finish this at some point in the year, most likely whenever I take the  tree down and have to stare at a half-blank wall.

2)  Photo note cards.  Earlier this month, I helped plan a church fundraiser, at which I also tried to sell note cards featuring botanical photos I’ve taken in recent years.  I told myself if I sold even one package of cards, it was a success.  Well, I sold THREE packages of cards, so it was a raging success in my book.  Honestly, I was not sure how any of that might work, seeing as I’d never tried such a thing.  The whole experience was inspiring enough to make me want to set up my Etsy shop.  For real.  You see, technically, I’ve had an Etsy shop for almost three years, and while I’ve purchased fine items through Etsy, I still have not found the time (or patience, or whatever) to sell some of my crafts.  I am now busily working to watermark my cards, set prices, and do many, many other tedious tasks before it goes live.  I’m looking forward to taking a shot at it in 2012!

3)  This blog!  I cannot neglect the most obvious creation that was totally new, sometimes very weird, but all-around very good in 2011.  I set out to create this blog so I could share my crafts, work on my writing, and connect with some of my fellow crafters in a new way.  While I’m not sure how frequently I’ll be posting in 2012, I intend to keep at it.  It’s been a lot of fun to share many of my crafts and ideas, as well as be inspired by the entire process.  This year, I’ve felt that this blog has helped me seek out new projects and endeavors, and I hope to expand some of my ideas in the new year.

Happy 2012 and may the crafty spirits continue to grow in us all!

Kindergarten Crafting

Yeah, yeah…I haven’t posted in a billion years.  I’m busy, people!!  However, a  friend recently read my last post (and if she just got around to doing so, then I don’t feel so bad), and commented on how cool it would be to get a bunch of people together with random materials without plans or specific ideas.  Just straight up crafting, like little kids do when you give them a bunch of stuff and say “have at it.”  How fun would that be??  If you were to attend such an event, what materials would you bring?  I’m definitely thinking such an event is in order, especially as the cold winter months draw near…

Since I haven’t posted squat in such a very looooong time, here are a few updates to ongoing projects, along with a few new ones.

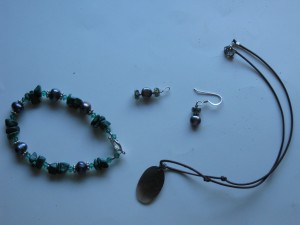
In my very first blog post on this site, I tried to make a pair of wire-wrapped earrings.  When I started that project, I was fixated on creating an exact style.  As I found out in creating the earrings, wire wrapping is not for sissies.  In short, I had no clue what I was doing.  I also felt something was off, but I couldn’t quite put my finger on what felt wrong.  Recently, I dug out those earrings and, after toying with the idea of wrapping even more wire around them, I just decided to let it go.  They were perfect as-is.  You know something else?  I think what was “wrong” with them back in January was the color scheme.  Those earrings were meant for October, not January!  Here they sit atop one of my favorite autumnal scarves with which I pair them:

Once I decided the earrings were wearable, I then focused on an accompaniment: a bracelet made from mismatched purple and gold beads.

Finally, the wall quilt continues to expand, slowly but surely.  Now that there’s a slight chill in the air, you can bet it will continue to grow.  I also plan to re-make our headboard (it uses the same materials as the wall quilt), so I may couple those crafts and work on them soon.  The tough thing about the wall quilt is finding quality fabrics that look nice in the space and have interesting textures and patterns.  So I continue to scrounge for those…

What do you make of the splash of teal in the middle?

Material girl

Since my last post, I’ve continued to ponder project versus process orientation in my crafting.  Actually, I’ve been a) feeling low from a lack of time and energy to actually make stuff, b) trying not to beat myself up for a lack of time and energy to make stuff, and c) surveying the many, many materials with which I could be creating new crafts.  Funny how when we turn our attention to something it grows.  Well, now it seems like all those materials I’ve been surveying are multiplying…by the hour.  All of a sudden, I have loads of stuff but little time or direction to do much with it all!  Ah!  No wonder my head spins when I try to sleep at night: my mind wants to craft, craft, craft, but my body wants to sleep, sleep, sleep.

Good thing I am also in a cleaning-out mode, which is helping me sort through some of these materials.  It’s also a good thing that my last post taught me I can approach crafting by simply looking over materials without specific goals or projects in mind, knowing that the crafts can bubble up from said materials.  In this post, I’ll showcase many of these fine raw materials.  I do have a few project ideas for each material, but for now, I’d like to stay open to suggestions and possibilities as they arise.

Clean up needed on aisle 4

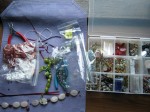
First, I cleaned out my stock.  I started with one drawer at a time (beads, in this case).  I had no idea there were so many beads and old, mismatched jewelry pieces in that little plastic box!  Once I sorted out the “junk” (even I have a limit on how much stuff can hang around before I give it away), materials with real potential emerged.  Here are some groupings of the “to-keep” materials from the Great Bead Purge of 2011.

Green and dark silver beads and a funky shell

Large red and white plastic beads; smaller brown beads

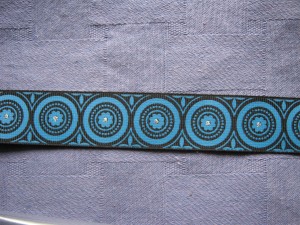
After bead purging time, I attacked my random ribbon collection.  I generally enjoy all kinds of gift bags, but most especially I prize them for their handles.  I tend to snip them off and stash them anywhere I can, which, you can imagine, amounts to a tangled mess in more than one place.  So after unraveling a few of these such messes, I found one true winner and lots of it.

Wide black-and-blue ribbon (thanks, Jo!)

Finally, I know many who might ask, “what can one crafter make out of a single bag?” but I ask, “What CAN’T be made from an attractive, durable paper bag??”  So many possibilities…

Super cute, yes?

Unexpections

Do you like the title?  It’s my attempt at a portmanteau or two words put together.  In this case, I was going for “unexpected connections,” which is a bit too many syllables, if you ask me.  My sincerest apologies to all readers who didn’t like the title.  I hope you keep reading anyway!

How to attach this to a flexible hair clip?

Last weekend, I had the urge to try a new craft with a bunch of old random supplies that were doing little except collecting dust.  I love having short hair (especially lately, what with ninety degree temps), but sometimes lack inspiration in thinking about what to do with it to make it look styled.  As I pawed through my jewelry box, sorting out old pieces I wanted to up-cycle or give away, I felt some new crafts coming on.  The first thing I tried was affixing a piece from an old bracelet to one of the many flexible hair clips I keep around.  Yet, as soon as I began working, a problem emerged: I could not find a way to adhere the bracelet piece (with its inflexible metal base) to the bendy clip.   Wire it?  Glue it?  None of my ideas seemed like they would work, so I rejected them all.  I was becoming a little dismayed, as I’d already decided whatever I created with these clips, I would be wearing to an upcoming wedding.  And that was a moment which gave me real pause:  I was already committed wholeheartedly to an outcome that I had no idea about.  One moment I was caught up in playing around with sparkly pieces, and then, in the very next moment, I’d already jumped ahead to its purpose without succeeding at making the thing!  I realized how disappointing such a process can be, and fortunately, I took a step back to re-assess my expectations.  I surmised there’s just no way I could get the metal piece to stay on the clip.  And as soon as I committed less to the final product and more to the process, not one but two ideas showed up.

1:  Keep the clip concept, but use different materials.  I’d already dismissed the idea of wire-wrapping the metal piece to the clip, but hadn’t considered that wire might work better with a different decoration.  Hmm…what do I have boxes of that can be wire-wrapped to most anything??  Beads!


2:  Keep the sparkle, lose the clip.  Months ago, I purchased a nifty flowered pin that also contains a clip for affixing to hair (a pinclip, if you will.  What?  I like words!).  Said pinclip was cute and multifunctional, yet it lacked a certain pizzazz.  So, I followed the old Vegas showgirl axiom:  just throw some glitter on it (in this case, I did so after applying hot glue).  Result?  Sparkle!

The funniest thing to me about these two crafts is that neither will likely fulfill my original intention of wearing them to the wedding.  However, had I not realized my initial, unrealistic connection to the outcome, both of these fantastic pieces might never have been made.  I’m hoping I’ll continue to have success with this method of working in a few upcoming projects, specifically ones for which I have materials, but no clue what to do with them.  What unexpections will come from them?

Sparkle accomplished

You say tomato…

…I say “boring.”  This post owes inspiration to my husband’s recent suggestion.

Old place mat detail

The back story:  A few years ago, I made these quick and nifty place mats for my kitchen.  The apartment I lived in at the time was small, a square corner of the kitchen the only place for a (reaaaallly small) table and two chairs.  The space had a big window, but still seemed dark much of the time.  So…I brightened the table up and provided an easy-to-clean surface in one craft: I bought one large sheet of specialty paper from my local craft shop, cut the paper in half, and laminated both.  So easy and cute!  One of my favorite things about these papers is the array of creatures hidden in their patterns.  Can you find them all?

The update:  Last weekend, as we ate a quiet meal together, my husband glanced at these fine place mats and wondered if we could update them.   I asked what he meant and he sheepishly replied, “These are nice, but they’re, uh, just a little…boring.”  I have to say I had been thinking the same thing.  Our kitchen is a bright space, with large, east-facing windows.  Although the paint in the kitchen is close to the green swirls in the old place mats, touches of bright color dot the room.  In other words, it was time for an upgrade.  Luckily, that’s an easy request for this type of project.

We went to the craft store down the block and found a variety of cool papers: old travel maps, nature scenes, and funky, mod-patterns.

New place mats

Amidst all of these possibilities, the final choice seemed to just jump out at us.  We both enjoy travel and vintage travel images (this kitchen displays vintage Italian posters, which we have hung in our dining area, as well).  The deep colors and vibrant graphics add a sense of fun to the room, and as with the old place mats, once laminated, the mats are both visually catchy and very user-friendly.

Our colorful kitchen table

For those who’d like to change the dynamic of an eating space quickly and inexpensively, I highly recommend using this technique.  If you don’t have a laminator, office supply stores like Staples usually offer low-cost laminating services.  I’ve been pleasantly surprised at how easy it is to use a laminator; the only trick to using one for this type of project is to position the colored paper well inside the edge of the plastic sheet (so you have a nice, crisp edge that won’t peel).

Clean edge of the finished place mat

However, if you goof up and the plastic edge peels once you’ve finished laminating (or, if time wears the edge away), you can simply use clear packing tape to wrap over that edge and cut to size.  The paper we used for this project cost a total of $3.50, and the mats made from it can last for years.  In fact, I moved the old place mats into the dining room for now, but I plan to keep them around in case we want to use them again.  I also plan to make a few more sets of mats using different colored papers.

Remember tuna surprise?  The infamous cafeteria dish many of us were served at school or home that contained unidentifiable ingredients?  Well, this post is nothing like that.  I just couldn’t think of a catchier intro (but “catchier” is a pun on tuna).  Anyway…

In creating my last post (the wish list), I did so with the feeble hope that such a task would guide my crafting.  And it has done  just that, but not in the way I’d expected it to (when is that ever the case?).  Here, I’ll detail several detours and new paths I’ve taken with some surprising results.

#1: Surprise!

A few weeks ago, a neighbor called with a surprising offer: would we like their used wicker patio furniture?  It was a grey, listless day, so the phone call and subsequent offer perked me up a bit.  I took a look at what the neighbors were offering, and without much thought said yes.  Not a second after I began hauling the loveseat, chair, and footstool up the back stairs to our patio did my mind begin its swirling:  the chairs probably needed painting, which might also require priming and/or sanding…I might need to move other items off the patio to make room for the new stuff…there are no cushions!  I’d need to make some, but out of what?  Cotton?  Polyester??  Go with a simple color or a cute, summer pattern???  And on and on it went…

That is, until I began to do a bit of research.  A quick web search revealed the true costs (both of time and money) involved with spray-painting wicker.  So even though I had a great color scheme picked out (dark espresso brown for the wicker; plain off-white for the cushions), the cost of all of that pretty much put the lid on the spray-painting plans, at least.  And then a funny thing happened.  I let the furniture just hang out on the back patio (it was still pouring by that point), and the next day, when I looked outside the kitchen window, I decided the furniture looked great as-is.  All it needed was some gentle cleaning and simple cushions.

Before

I made the cushions from foam batting and regular quilt batting (found at any fabric store) and shower curtain liners from Target!  So far, the curtain liners have proven to be a wise choice, as they are comfortable and water-resistant.

After

#2: The domino effect: a revision

Well, despite my many starts and stops with the “paper quilt” project I’ve posted about numerous times already, the project just wasn’t doing what I wanted it to.  That is, even though the colors wove together in a catchy, unique fashion, the overall effect just didn’t look quite right.  Specifically, when I held the board up to the wall upon which I’d intended to hang it, it just looked…busy.  Working on this project has been a real eye-opener for me with regard to the necessity to stick with something until it clicks, even though that can be weird, uncomfortable, and the end result unknown.  As I posted recently, the project itself seemed to take on a unique energy all its own, which ebbed and flowed with very little input from me (or regard for my feelings about it – the nerve!).  Much of the time, the whole process felt like that game “hot and cold,” when one player directs another (whose eyes are closed) with verbal cues.  So even though I felt I was getting progressively “warmer,” I still seemed to be operating in the “freezing” zone.  That is, until I started project #1 above.  Once I made that craft, I realized a key element was missing from the paper quilt idea: texture.  Although the “quilt” pattern was central to my concept, I knew all along that I didn’t want to make an actual quilt.  And yet, the appeal of making something quilt-like stemmed from the addition of textiles to the space.

We have many lovely framed photos in this space, so I wanted something that added a new dimension.  After making project #1 above, I had a lot of scrap fabric left over, fabric that had a nice sheen to it, which injected a sense of calm into the space.  Realizing this calming quality was exactly what had been missing from the paper version of my sorta quilt, I didn’t hesitate to begin measuring and cutting the fiber board upon which I’d glued the paper into 12 x 12 squares.  I also have to admit that ripping off the previously-glued paper strips felt a little rebellious and a lot good.

Anyway, a little batting draped in different textures and shades within three color families helped the project come to life.  The photo to the left shows where I currently stand with the new version; it’s really what I originally intended the project to be, that is, interesting but not so much so that it overwhelms the space.  Finally, there are two “secret” unique features to this new fabric version that also make the project work.  Since the squares are made from foam insulation board covered in quilt batting and fabric, the entire wall will essentially be insulated.  This will add to the comfort of the room, as the wall upon which the “quilt” hangs is an unprotected, exterior wall, so the room gets rather chilly in the winter.  Second, since each square is mounted individually, at any time I can decide to create a new pattern from the squares.  Those who know me know my love of changing the look of a room from time to time, not necessarily drastically, but just enough to make it seem new.  This craft finally makes all of these things a possibility.

Wish list

Now that I’m in a lull work-wise, one would think I have ample time to dream and craft.  Somehow, though, those two things aren’t happening.  Perhaps they are, but not 24/7, like I’d love them to.  So this week, in order to help organize my mind and heart, I’m creating a craft wish list.  Here are my top projects, both on-going and not-yet-going, in no particular order (yet):

1.  Keep working on the paper collage I’ve now written about several times.  No new progress has been made on the crafting, but if you recall my first post about this craft, I’ve never again felt the urge to trash the whole thing, so I’ll count that as “moral progress.”

2.  Check out fabrics for this project:  http://www.mysimplehomelife.com/2011/03/fabric-rug-tutorial.html

I’m not quite sure I’m ready to begin crafting this one, but I’d like to see what’s out there material-wise.

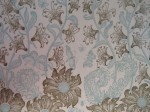
3.  More fabric fun: choose material with which to recover one of our sofas.  I’ve already shopped a bit and here are some favorite options so far:

  All are textured, soft, and would be a major improvement to what I refer to as the traveling slipcover that now graces the couch.  I’ve taken measurements; I just need to take the plunge and buy the fabric.

4.  Finally, a while back I alluded to a project I’m slowly but surely working on.  This craft is not large in scale, has been in process for about six months now, but has not yet “hatched.”  It is, however, HUGE in details, most of which seem to multiply and many of which have flustered me no end.  I am hoping the end of some of that process is nearing so I can finally reveal it!  I keep dutifully putting in the time, bit by (some days, excruciating) bit.  Stay tuned for what I hope will be an exciting new adventure.

In my last post, I wrote about failure, and as I now re-read that post, I can see how crafting has helped shape my views on success.  I think I’m just now waking up to how uncomfortable I’ve always felt with the notion of success as the opposite of failure.  In fact, in titling this post, I’d originally written “from mess to success,” but that implies that one necessarily leads to the other, which seems to contradict what I just wrote!  I’ve long suspected these concepts to be less opposites and more in a relationship with one another, and I’ve certainly believed them to be completely subjective notions.

If that last statement is something I really, truly see as foundational, then what do I see as success?  Many times, I see a project waiting to happen within small, perhaps even insignificant objects most of us would ordinarily discard.  The project I wrote about in my last post is a fine example; the materials I’m using in that creation are simple foam board insulation, scraps of colored paper, and glue.  Here is where I am in the process of that craft:

It’s certainly a rewarding feeling to see the vision emerge, and in addition to feeling anxious and excited to complete the project, I’ve already received interesting feedback on what it “is.”  As I glued the “brown” section as now completed, my husband commented that it immediately reminded him of autumn, his favorite season.  His comment provoked surprise in me, as I had not even considered the connotations this creation could inspire.  Yet, at the same time, I still carry a feeling of worry over whether or not it will all come together.  Perhaps that mingling of uncertainty and immediate personal connection has something to do with real success?

As another way of meditating on the idea of success as subjective, I found this craft online this week and instantly felt the urge to try it:

http://www.joyinthejumble.com/2011/05/mothers-day-brunch.html

(Scroll to “The Decor” to see the hydrangea pomander).

When I viewed this example, I mentally checked off the items I already had to create it:

Corsage pins: check.

Brightly-colored paper: check.

Patience to cut said paper into tiny, intricate shapes:  Uh-oh.

But just as soon as I felt a twinge of despair, I remembered a previous post about my hot-glued silk forsythias.  And to the dollar store I went.  As it turns out, one need not use paper for this craft.  I found several interesting silk flower samples (each for one dollar!), some which are replica hydrangeas and some which are not (the pink and purple flowers are supposed to be orchids).  I delighted in ripping the silk flowers from their plastic stems, much more so than I likely would in cutting endless shapes out of paper.  And so for a time, my workspace looked like this:

Organized chaos

To a casual observer (who might note that this space is really a dining room), this may have looked like, well, a total mess.  Stems and fake leaves sat next to picked-apart petals.  My bead box splayed open to reveal crystals and pearl beads, many which insisted on rolling right off the table.  Various cutting instruments were dusted with specks of Styrofoam, which constantly flaked off the little globes I stuck the pinned flowers in.  I could literally feel the OCD tendencies rise up within me as I worked.  Yet the “mess” was necessary and deliberate; without it, the creation would not have happened.  Now, that end result sits atop the very (once-messy) space in which it was born.

   I can’t help but go back to that forsythia post (those are the very same plants in the background of this photo).  As much I can appreciate the logic of the need for mess, the mess itself still unnerves me.  I physically feel uncomfortable with it at times (with the forsythia, the instigator was the hot glue; this time, the Styrofoam flecks).  Yet, at the same time, I need to be honest with myself.  The thing is, at times, I sort of like the mess.  For example, this came up when I first worked with clay.  I remember feeling surprised at how cold it was.  And the earthy smell, the grit, and the muscle it took to turn the blob into a pot or a mug was utterly satisfying.  To be immersed in it was at the same time simple and magical.  The mess itself carried a feeling of suspension, of a knowing that went beyond logic or seeing.  I never quite got the hang of creating a perfect piece of sculpture.  One might say I didn’t succeed at working with the medium.  And yet, it felt like I did.  I succeeded in understanding what it meant to be in the mess and to find a way, not out of it, but to live with it and in it.  That recognition has proven powerful beyond words, and maybe, it’s just too large to fit under a narrow title like “success.”

Craft fail?

What happens when a craft project totally bombs?  Something we’ve invested time, energy, and money into starts to meander off track or suddenly looks very different than the picture in our minds.  The accompanying feeling we experience is like being at the top of a roller coaster only to suddenly drop way, way to the very bottom.  An exaggeration perhaps, but a shock all the same.

I think it’s at that very moment when the feeling of “dropping” hits that a project actually isn’t failing; it’s in the balance.   At that point, it can go one of two ways.  To illustrate: the photo below shows a project I’ve thought much about but done very little with in the past month, largely because of this feeling that it’s just not working.

Scraps of paper mounted on foam insulation

I began this particular project with a sense of curious optimism mingled with just enough doubt to push me to try to keep working on it (that’s often a good recipe for crafting, I find).  However, when I finished the stage above, I felt myself hanging in that precarious moment, a decision beginning to emerge in my head: stay or leave?  Press on and see what comes out or cut and run?  What I cannot exaggerate is how long that balance stage seemed to last, and the numberless tricks my mind seemed to want to play in order to escape it.

Cut and run won out.  At least initially, it did.  While I didn’t physically destroy the model I’d been working on, I stashed it in the corner of my dining room and began scowling at the thing every time I passed by, as though if by glaring at it, it would somehow come to life.  Soon, I was playing an even bigger game called “out of sight,” scheming about where to stick the project so I didn’t have to look at it anymore.  (Not as easy thing to do, since the mounting medium is at least five feet tall and three feet wide).  Yet…I didn’t stash it anywhere.  I just let it sit there, along with feelings of ambivalence and fatigue over the mental cartwheels I was doing over a project I was beginning to loathe.

Stage 2: getting somewhere

And then something changed.  I really can’t put my finger on it, but I realized this week that I may have been dreaming too big.  This project will be mounted on our living room wall, a huge, blue (and, currently, ominously blank) space.  Actually the space itself doesn’t daunt me, but the idea of what to fill it with does.  When I came up with the idea to scale down just a but, I was able to re-commit myself to the project.  The renewed sense of drive wasn’t necessarily due to a barrage of new ideas (although I certainly experienced that).  It seemed to come from a different place, one that made me feel as though, in that moment of hanging  in the precarious balance, I could simply reach up and let myself off the hook.  And so I did.

I don’t have the “finished” project yet, but now I can’t stop working on it.  I’m eager to see what it becomes, what it looks like.  And what the lesson or gift will be.  Is there such a thing as a craft fail?  Or is a fail just a brief backtrack to a new place from which to re-group?

Artfully arranged

This week, I’ve been under a bit of pressure, mostly of the self-imposed variety.  As I considered what to write in this post, my mind jumped to two MAJOR projects I am undertaking: one large in physical size, and one in detail (more to come on both, I promise).  And then, as soon as I decided to write about something else entirely, it hit me: am I creating something just so I can write about it here?

With regard to my first “project” here, the answer is no.  At least I feel I can get away with that answer, because technically, I didn’t make anything.  Let me explain:  The photo above depicts a bookshelf in our living room.  Atop this bookshelf at any given time rests a few meaningful objects.  Occasionally, I like to re-arrange these objects, adding or deleting some from another place in our home to add vitality and visual interest to this otherwise forgotten corner of the house.  Sometimes when I move new objects in, the space looks even more forgettable, which, no surprise, makes me disregard the corner and the objects.  Other times, the combination of objects catches my eye each time I pass by it.  I can’t fully explain it, but I know that a such a relatively simple arrangement brings a sense of order and peace into my day, so much so that when I see it, I often pause just to stare at it.

Again, I didn’t actually make any of the objects pictured above.  However, I did play with the arrangement of these objects.  Some might call this art (and if so, I’m truly flattered).  Some might call it artifice, something I did with the intention of creating a perception.  What’s the difference?  Is there always one?  Does it matter?

I think there are differences, ones that do matter.  One difference takes me back to the beginning of this post, and that slight nagging urge I felt to create something just so I could create something else from it.  I don’t know all the technical terms, but I know many capital-a Artists would be all over me for doing such a thing.  I would be taken to task for creating for the sake of fulfilling my want/need for attention, which takes away from the art itself.  To that accusation I would offer two defenses: one, I caught myself and owned up to it.  Does that make me any less guilty?  Maybe not.  But here’s the second defense: I don’t like the photo above.  It really fails to capture the most attractive parts of the arrangement itself, namely, my lack of planning and total absence of intention in creating it.  In other words, I didn’t sit down and think, “I’m going to group together some glass pieces with a recurring red and green color motif.”  Instead, I just started moving objects, playing around with their order until I found a combination that looked good to me.  Even now as I glance at the photo and the arrangement itself, I feel disappointed at the lack of pizazz in the photo, and how there’s seemingly no way to document the process by which I created the arrangement.  That is, other than what I’m doing right now: writing about it.  Does that act make the creation itself any more or less than what it is?  I’ll have to keep thinking about that.

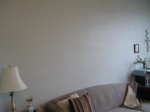
As for the other two big projects I’m working on, I’ll just show a component of one: a large, blank wall next to my artful arrangement.  I have one idea for what to do with this space, but I wonder if and how what I’ve written above will change my mind?

The canvas: a blank wall